|
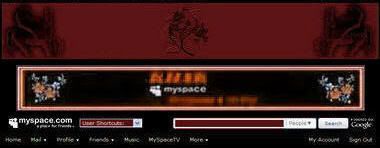
Im folgenden Guide sind meine Methoden, um auf der Profil-Seite an jeder Stelle des Top-Divs einen Banner einzufügen, beschrieben. The following tutorial explains my method around the inserting a banner to the multiple locations in the top page area. |
- Um einen Banner/Bild oberhalb Myspace Werbung einzufügen:
- To put a Banner/Image above Myspace Advertisement:
|
<style type="text/css"> .K {Adding Top Banner} body {margin-top:320px;} div.KhAkBannerA img {border:0px !important;} div.KhAkBannerA {position: absolute; left: 50%; width: 800px; height: 300px; margin-left: -400px; top: 0px; _margin-left: -390px; _top: 0px; } </style> <div class="KhAkBannerA"> <a href="Your Page URL"><img src="Your Image URL"></a> </div> |
☼- Das Bild wird im Vorschau nicht angezeigt.
☼- The image will not show up on the Preview Page.
☼- "320" = Ist die Höhe des benötigten freien Raumes.
☼- "300" = Ändere es in die Höhe deines Bildes.
☼- "-400" = Schiebt das Bild nach links/rechts.
☼- "0" = Schiebt das Bild hoch/runter.
☼- Passe _margin-left and _top Zahlen an um die position in
Internet Explorer zu regeln. ☼- Ersetze die "URLs" mit deinen eigenen URLs.
☼- Dein Banner/Bild wird Klickbar sein.
☼- "320" = Is the height of the free space above whole profile.
☼- "300" = Change it to the height of your image.
☼- "-400" = Moves the image left/right.
☼- "0" = Moves the image up/down.
☼- Adjust _margin-left and _top numbers to fix the position on
Internet Explorer. ☼- Replace the "URLs" with your own.
☼- You'll have a clickable Banner/Image.
| ^° It Will Look Like: °^ |
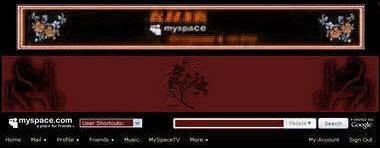
- Um einen Banner/Bild unterhalb Myspace Werbung einzufügen:
- To put a Banner/Image below Myspace Advertisement:
- To put a Banner/Image below Myspace Advertisement:
|
<style type="text/css"> .KhAk {Adding Top Banner} div.profileWidth div.clearfix div { margin-bottom: 320px !important;} div.profileWidth div.clearfix div div, div.profileWidth div.clearfix div.profile { margin-bottom:0px !important;} .KhAkBannerB img {border:0px !important; width: 800px;} .KhAkBannerB {position: absolute; left: 50%; overflow: hidden; margin-top:10px; margin-bottom:0px; margin-left: -400px; top: 90px; _margin-left: -390px; _top: 90px; } </style> <div class="KhAkBannerB"> <a href="Your Page URL"><img src="Your Image URL"></a> </div> |
☼- "320" = Ist die Höhe des benötigten freien Raumes.
☼- "800" = Ändere es in die Breite deines Bildes.
☼- "10" = Regelt den Abstand des Bildes zur WerbeTafel.
☼- "-400" = Schiebt das Bild nach links/rechts.
☼- "90" = Schiebt das Bild unter 'WerbeTafel' hoch/runter.
☼- Passe _margin-left and _top Zahlen an um die position in
Internet Explorer zu regeln. ☼- Ersetze die "URLs" mit deinen eigenen URLs.
☼- Das Bild wird im Vorschau nicht angezeigt.
☼- Dein Banner/Bild wird Klickbar sein.
☼- "320" = Is the height of your needed free space.
☼- "800" = Change it to the width of your image.
☼- "10" = Sets the gap of the Image to the Myspace Ad.
☼- "-400" = Moves the image left/right.
☼- "90" = Moves the image under the 'Myspace Ad' up/down.
☼- Adjust _margin-left and _top numbers to fix the position on
Internet Explorer. ☼- Replace the "URLs" with your own.
☼- The image will not show up on the Preview Page.
☼- You'll have a clickable Banner/Image.
| ^° It Will Look Like: °^ |
- Um einen Banner/Bild zwischen 'SuchLeiste Und Navigation-Bar'
einzufügen:
- To put a Banner/Image between 'Search And Navigation Bar':
einzufügen:
- To put a Banner/Image between 'Search And Navigation Bar':
|
<style type="text/css"> .KhAk {Adding Top Banner} div.profileWidth div.clearfix form { height: 320px !important; margin-bottom: 15px !important;} .KhAkBannerC img {border:0px !important; width: 800px;} .KhAkBannerC {position: absolute; left: 50%; overflow: hidden; height: 300px; margin-left: -400px; top: 140px; _margin-left: -390px; _top: 135px; } </style> <div class="KhAkBannerC"> <a href="Your Page URL"><img src="Your Image URL"></a> </div> |
☼- "320" = Ist die Höhe des benötigten freien Raumes.
☼- "15" = Regelt den Abstand des Bildes zur Navigation Bar.
☼- "800" = Ändere es in die Breite deines Bildes.
☼- "300" = Ändere es in die Höhe deines Bildes.
☼- "-400" = Schiebt das Bild nach links/rechts.
☼- "140" = Schiebt das Bild unter 'Search Bar' hoch/runter.
☼- Passe _margin-left and _top Zahlen an um die position in
Internet Explorer zu regeln. ☼- Ersetze die "URLs" mit deinen eigenen URLs.
☼- Das Bild wird im Vorschau nicht angezeigt.
☼- Dein Banner/Bild wird Klickbar sein.
☼- "320" = Is the height of your needed free space.
☼- "15" = Sets the gap of the Image to the Navigation Bar.
☼- "800" = Change it to the width of your image.
☼- "300" = Change it to the height of your image.
☼- "-400" = Moves the image left/right.
☼- "140" = Moves the image under the 'Search Bar' up/down.
☼- Adjust _margin-left and _top numbers to fix the position on
Internet Explorer. ☼- Replace the "URLs" with your own.
☼- The image will not show up on the Preview Page.
☼- You'll have a clickable Banner/Image.
| ^° It Will Look Like: °^ |
- Um einen Banner/Bild unter ' Navigation-Bar' einzufügen:
- To put a Banner/Image below 'Myspace Navigation Bar':
|
<style type="text/css"> .KhAk {Adding Top Banner} div.profileWidth {width:800px; padding-bottom: 300px !important; margin-bottom: 15px !important; background-image:url(Image URL) !important; background-position: bottom center !important; background-repeat: no-repeat !important;} </style> |
☼- Ändere die Zahl "300" in die Höhe deines Bildes.
☼- Regelt den Abstand zu den unteren Tabellen.
☼- Ersetze "Image URL" mit deiner eigenen Bild-URL.
☼- Das Bild wird im Vorschau nicht angezeigt.
☼- Adjust the number "300" in the height of your Image.
☼- Sets the gap to the below Tables.
☼- Replace "Image URL" with your own Image URL.
☼- The image will not show up on the Preview Page.
| ^° It Will Look Like: °^ |

- Um in einem Künstler Profil einen Banner/Bild unterhalb der
Musik Navigation einzufügen: - To put a Banner/Image below the Music Navigation in an
Artist Profile:
|
<style type="text/css"> .K {Adding Top Banner} body {margin-top:0px;} body table {margin-top:320px;} body td table, body div table {margin-top: 0;} .KhAkBannerE img {border:0px !important; width: 800px;} .KhAkBannerE {position: absolute; left: 50%; overflow: hidden; height: 300px; margin-left: -400px; top: 210px; _margin-left: -370px; _top: 200px; } </style> <div class="KhAkBannerE"> <a href="Your Page URL"><img src="Your Image URL"></a> </div> |
☼- Das Bild wird im Vorschau nicht angezeigt.
☼- The image will not show up on the Preview Page.
☼- "320" = Ist die Höhe des freien Raumes unter der Musik Navi.
☼- "800" = Ändere es in die Breite deines Bildes.
☼- "300" = Ändere es in die Höhe deines Bildes.
☼- "-400" = Schiebt das Bild nach links/rechts.
☼- "210" = Schiebt das Bild unter 'Musik Navi.' hoch/runter.
☼- Passe _margin-left and _top Zahlen an um die position in
Internet Explorer zu regeln. ☼- Ersetze die "URLs" mit deinen eigenen URLs.
☼- Dein Banner/Bild wird Klickbar sein.
☼- "320" = Is the height of the free space below music navigation.
☼- "800" = Change it to the width of your image.
☼- "300" = Change it to the height of your image.
☼- "-400" = Moves the image left/right.
☼- "210" = Moves the image under the 'music navigation' up/down.
☼- Adjust _margin-left and _top numbers to fix the position on
Internet Explorer. ☼- Replace the "URLs" with your own.
☼- You'll have a clickable Banner/Image.
| ^° It Will Look Like: °^ |

- Falls du dich für "A, B, C oder E" entschieden hast aber einen Flash
einfügen willst, ersetze das "DIV" Teil des Codes mit/durch: - If you have decided to apply "A, B, C or E", but you want to insert
a Flash, replace the "DIV" Part of the code by:
|
<div class="KhAkBannerA"> <embed src="Your Flash URL" style="width:800px; height:200px;" /> </div> |
|
<div class="KhAkBannerB"> <embed src="Your Flash URL" style="width:800px; height:200px;" /> </div> |
|
<div class="KhAkBannerC"> <embed src="Your Flash URL" style="width:800px; height:200px;" /> </div> |
|
<div class="KhAkBannerE"> <embed src="Your Flash URL" style="width:800px; height:200px;" /> </div> |
☼- Ersetze die URL mit deiner eigenen.
☼- Ändere die Zahlen in die "Breite & Höhe"
deines Flashes.
☼- Change the URL with your own.
☼- Change the numbers to the "width & height"
of your flash.


